
Do you want to setup your first Google Ads campaign, then this step-by-step beginner guide will help you to run Google Ads campaign as an expert. In this guide, you will learn how to setup and optimize Google Ads to get better results from your ads campaign.
Here are the 13 steps to run Google Ads like an expert.
Let’s get started
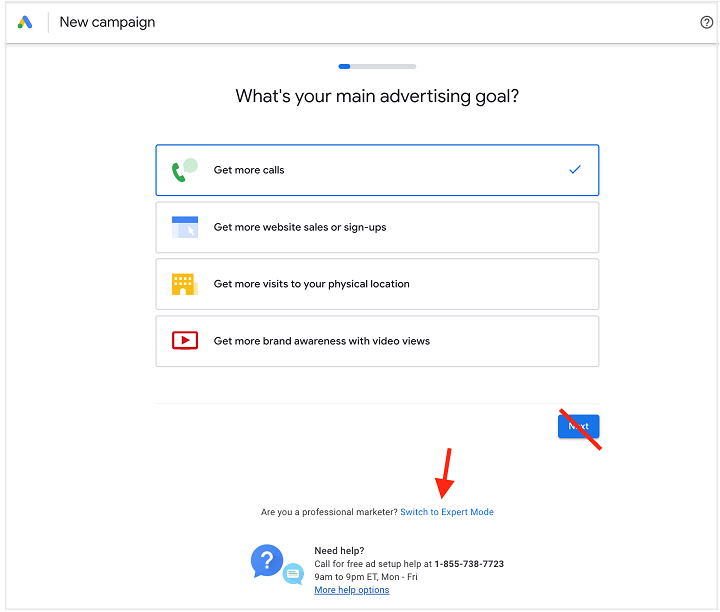
#Step1: Click on “Switch to expert mode”
If you are new and have not created an account in Google ads, then go to ads.google.com and click on “get started” and set up your account. Once you have done then Google will ask you to set up a Smart campaign, Smart campaign works smartly but utilize too much budget to learn about your product and their audience.
So here you have to act like an expert. First Google will ask you “Main advertising goal” instead of clicking “Next” you have to click on “Switch to expert mode.”
For this option, you need not to be an expert. This Google ads guide will walk you through each and every step to run an effective Google ads campaign.
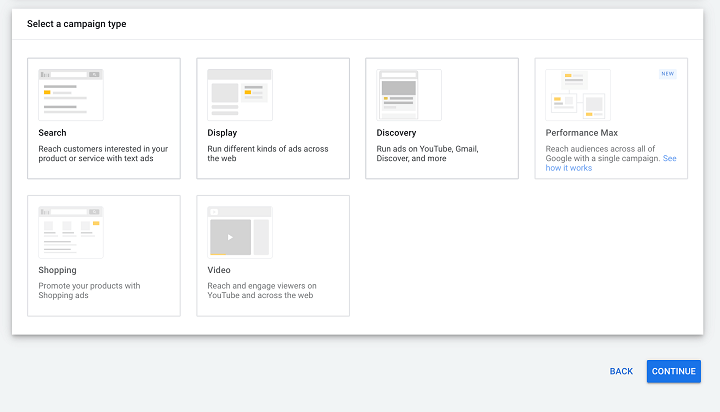
#Step2: Pick your campaign type
Selecting a campaign type is very important to achieving your advertising goal. Purpose of the campaign and goal should be clear before selecting the campaign type. There are different campaign types for a different purposes.
Now Google will ask you to choose “objective”. So here is the option you will get in Google ads.
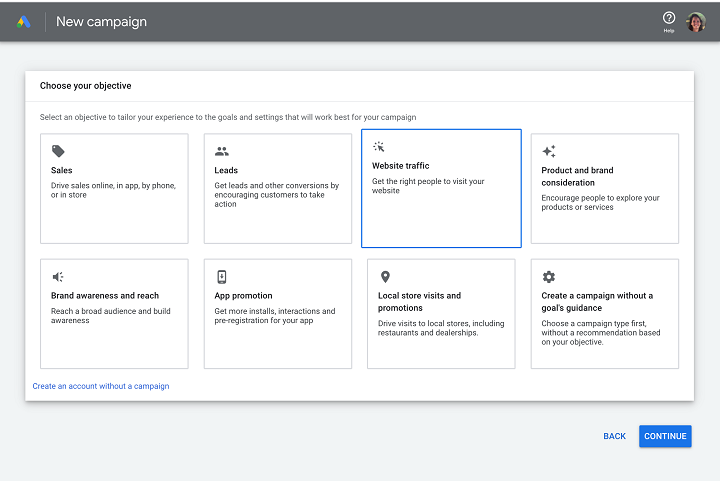
Depending on the objective you will get an option for the available campaign type. For this guide, we are going to create search ads, so let’s choose web traffic.
Once you select the objective, you will get options for available campaign types.
What are the different campaign types?
- Search
- Display
- Video
- Shopping
- App
- Discovery
- Local
- Performance Max
Now we can see what’s available:
Pro tip: Once you setup your first search ads, try to explore other campaign types to get more out of Google ads.
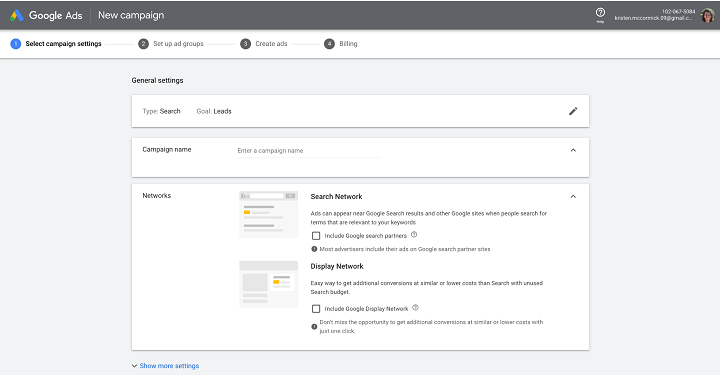
#Step 3: Set up the campaign
Now time to setup your campaign, Just setup general settings like
- Campaign name: This should be your name of the campaign, does not affect anything in campaign performance. Campaign name should be easy to read and understand. Best format for campaign name is [Geo] – [Brand] – [Product category] – [Product].
Campaign name: US – Nike – Basketball Shoes – Air Jordan
- Network: It is a Google ads partner network that allows you to show your ads in their partner network that includes publishers, blogs, news websites, Google search, free online tools, and more. This enhance your reach and increase the chance of getting more leads.
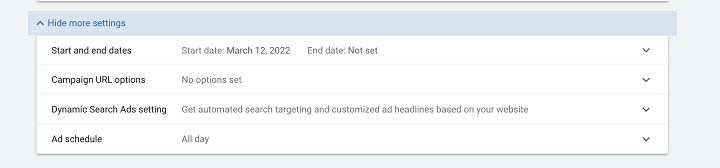
#Step 4: Set your ad schedule
Now you have to tell Google when your ads to be shown. You can set your ads timing depends your need. For example, if you don’t want to show ads in the early morning, you can change it in the ad schedule.
Just click on “show more settings” and pick your start and end date and schedule.
Pro tip: Schedule works according to your time zone. If you are targeting a different country then do check their time zone and schedule ads according to audience time zone.
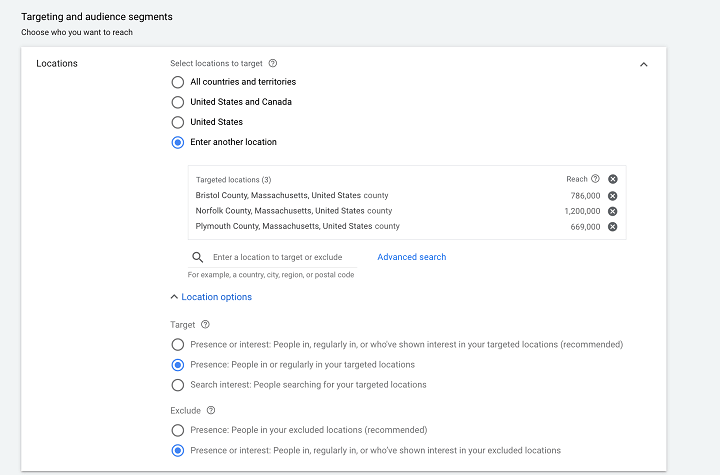
#Step 5: Specify location & language
It’s time to set the location and language for your ads. Here you have to select the target country where you want to show your ads.
#Step 6: Calculate your daily budget
Budget is the most crucial part of Google ads. You need to decide how much you want to spend on ads. Google provides you an idea of how many clicks and the impression you can get for a particular budget.
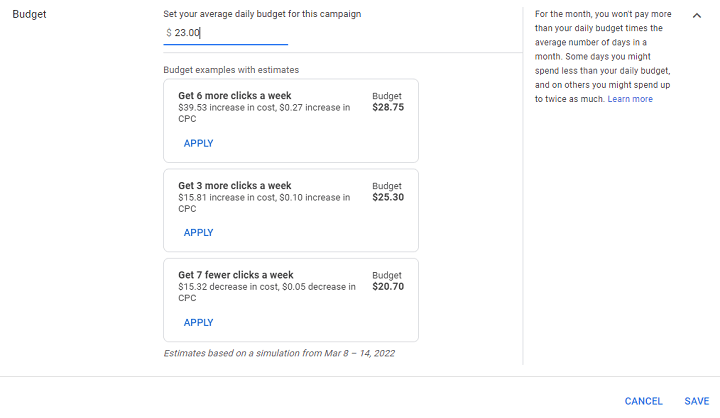
Before that, you need to research on industry benchmarks and target keyword average costs.
Suppose, if you have a budget of $200 per month. Divide it into 30 days. Your daily budget would be approx. $6.5. Now Google will estimate how many clicks and impressions you can get. If you agree with the estimated result then go ahead with the next step. If you are not then increase your budget and see estimated results that fit for your business goal.
#Step 7: Pick your bid strategy
There are different types of bid strategy, choose depends on your goal. But I suggest always select “Or, select a bid strategy directly (not recommended).”

Then choose the option available to you
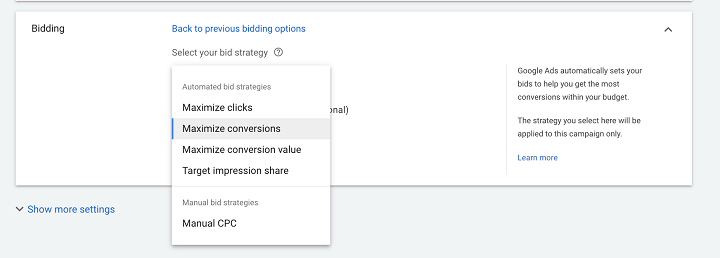
There are two types of bidding strategy
- Manual Bidding: In manual bidding, you can tell Google that this much CPC you are willing to pay for keywords. So that google will restrict itself and spend based on CPC provided by you. You can take control of the bid in a manual bidding strategy. But don’t bid too low, it limits your performance.
- Automated bidding: Automatically Google decides to bid for each keyword. Just look at the data on how much you are going to pay for a click.
In an additional setting, you will get options like ad rotation.
In my experience keep the best performing ads to get better results. So you can select “Do not optimize: rotate ads indefinitely”.
If you want to do an experiment on your ads copy, make two different copies and experiment.
#8 Step: Set up your keywords
Keywords are very important to run a Google ads campaign. Keyword is nothing but words and phrases that people type in google search. You have to bid for each keyword that you want to show your ads.
Before that, you have to setup groups. Please see the below screenshot.
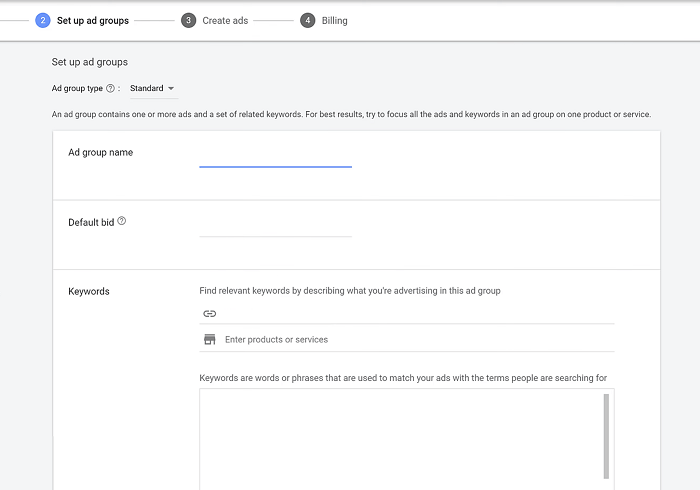
- Ad group name: Just name your ad group based on keywords and keep it organized.
- Default bid: Here you can set your maximum CPC bid for keywords.
- Keywords: For keywords make use of Google keyword planner or just use your website url. Google will suggest you some keywords and then choose relevant keywords for your product. Still have confusion about finding relevant keywords then just go through with the keyword research guide.
Google Ads Match types
In Google Ads you get three keyword match types option
- Broad match: it will show your ads to related keywords.
Example: Suppose your keyword is email marketing, broad match will show ads for emails, email tools. email sending, email client, email marketing tips, email blast, email campaign, newsletters, and other related keywords.
- Phrase match: it shows ads for keywords that have the same and similar meaning.
Example: Suppose your keyword is email marketing, Phrase match will shows ads for email marketing for free, email marketing free, email campaign, email blast services, email marketing lists, how to do email marketing, email marketing templates, unlimited email marketing, email marketing plugin for wordpress, email marketing software download and more.
- Exact match: It shows ads for only exact keywords and the close variants of queries.
Example: Suppose your keyword is email marketing, Exact match will show ads for email marketing, email marketing software, email marketing tips, email marketing tools, email marketing platforms, email marketing best practice, email marketing apps and more.
Always I prefer to use Phrase and Exact match type to get relevant traffic and conversion. But again it depends on your goal. If you want bring just traffic to your website then a broad match provide you more audience reach and website traffic.
#Step 9: Create your ad
Now it’s time to create your first ads. Create responsive ads as it standard ad format for search ads.
See the screen below and follow the Google Ads guideline
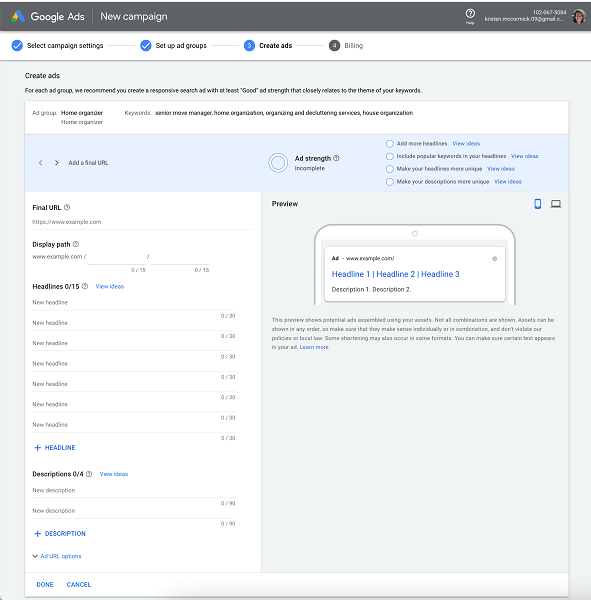
Google Ad copy pro tips
- Do follow google ads guideline
- Don’t forget to use CTA
- Follow the guideline for the character limit
- Write actionable and powerful Ad copy
- Don’t overdo. Write simple and clear Ad copy
#Step 10: Add on your ad extensions
Ad extension is an additional line of information to improve CTA and stand out from the crowd. To add an extension, navigate through ad extension and follow Google ads instructions.
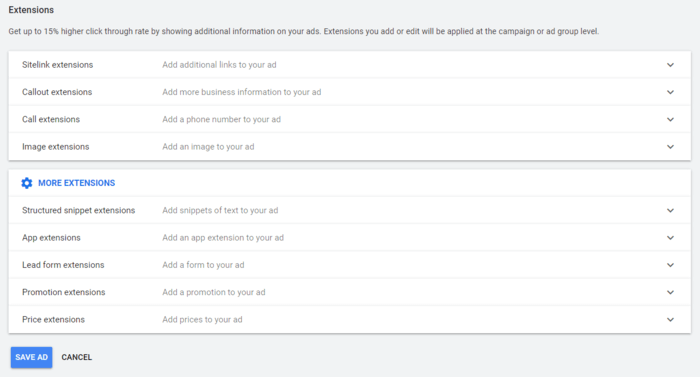
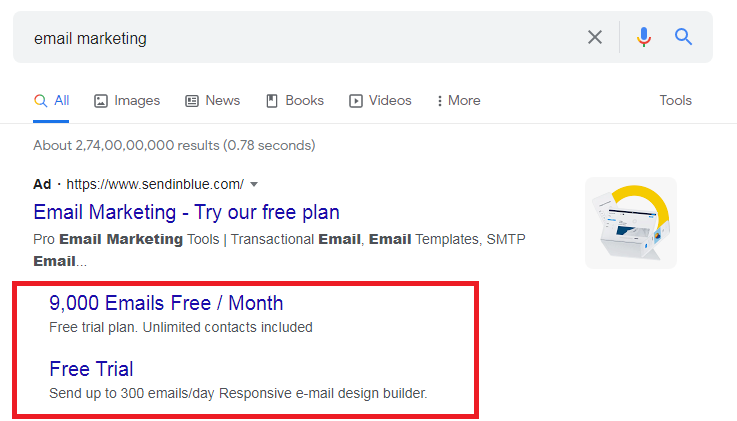
Example of Sitelink that give users more option to click on your ad links.
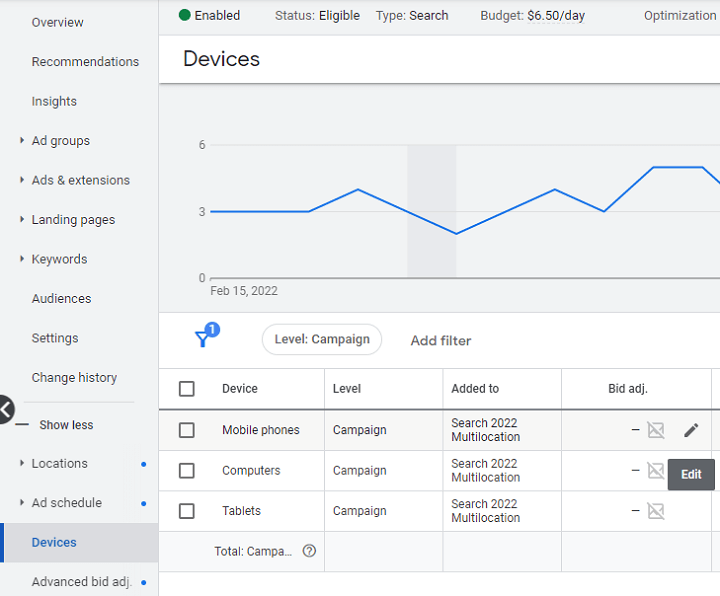
#Step 11: Device targeting and extras
In manual bidding, you can distribute your daily budget by telling google that you are willing to pay certain amount for Desktop or mobile device. Also, you have the option to exclude ads for mobile or tablets.
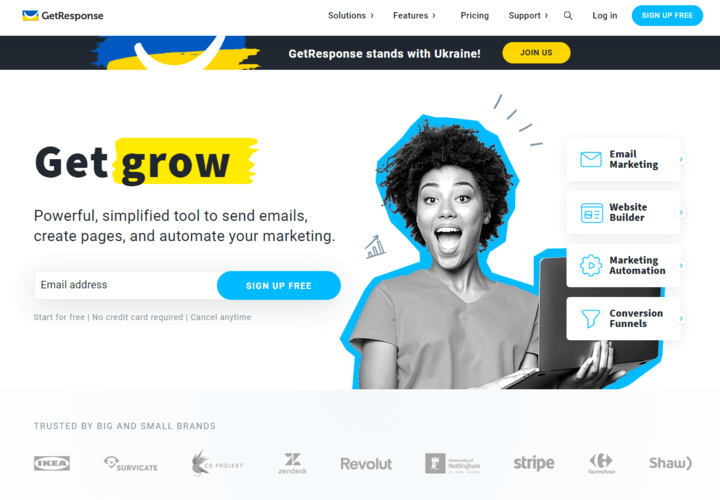
#Step 12: Don’t forget your landing page
Create a beautiful and engaging landing page to convert visitors into customers.
Here are a few landing page best practices to follow:
- Optimize the load speed of the landing page and make sure it’s secure and responsive.
- Give more importance to the CTA button. Make a clear and easy accessible CTA button.
- Create a responsive and attractive design.
- Ask only a few information in the form (email and name)
See the perfect example of a landing page for your ads.
#Step 13: Set your ad live
Now it’s time to enable your ads. Once you enable Google will take some time to approve your ads.
Once it got approved, your ads will be shown in Google search. You can pause or adjust bid strategy at any point of time.
Don’t do changes frequently. Google needs some time to learn your ads pattern and bid strategy. Do check your ads every day and keep a note what all things you need to change. Give two weeks’ time and do the changes according to your needs.
Conclusion
These 13 steps will help you to create your first ads in google search. Make use of Google Ads to generate more leads and grow your business.
Use these 13 steps to run Google Ads like an expert. For more help, you can always refer to Google Ads support and Digitaltech360 blog.